Here are a few methods I've found to make life easier (for cheap!) on the trail and in the shop.
THE LUBRICANT SYRINGE:
You can buy syringes and needles of various size in the veterinary section of your local farm/fleet store.
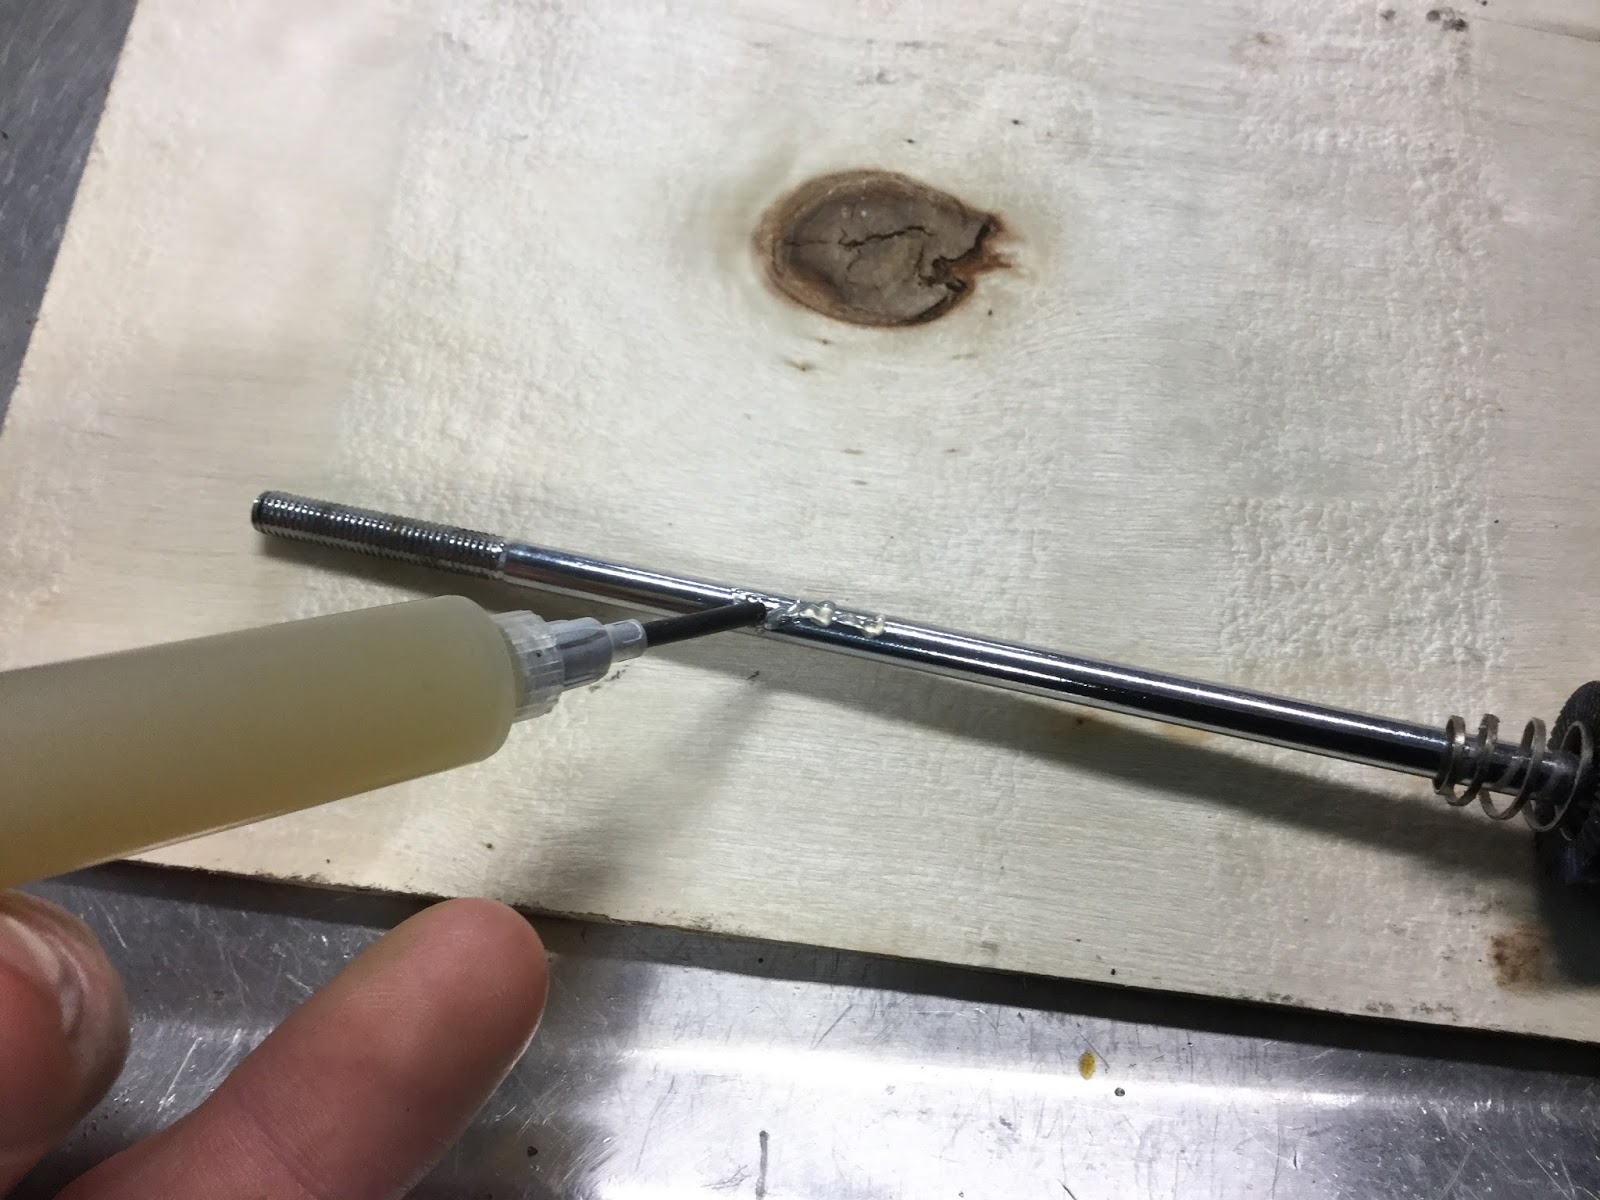
Attach the needle to the syringe and cut the tip of the needle off square. I also apply a bit of electrical heat shrink tubing to the needle to make it non-marring.
To load the syringe, place the tip of the needle into your tub of grease and draw the plunger back to suck grease into the syringe. (You may have to move the tip around in the grease to keep it from cavitating, there's a bit of a technique to this.)
For thicker greases, use a larger-gauge needle. Also for thicker greases you may have to load the syringe from the back by removing the plunger and packing the grease in.
Once you have it loaded, label the syringe with the type of grease and put it in your toolbox! This makes for an easy and mess-free way to dispense a little grease onto through axles, jockey wheel bearings or anywhere else you need lube.
An added bonus is that if you're working with grimy fingers, you avoid the possibility of contaminating your grease supply.
Save the needle covers that come with them, to cap off the syringe for storage:
CUTTING-BOARD FENDERS:
I bought a 2-pack of flexible cutting boards from my local Fleet Farm store for $1.59.
I then used a hot nail to punch appropriate holes for zipties, and made fenders for my fat bike:
They work great! I should point out that this is not a permanent solution, at temperatures near zero degrees Fahrenheit (-18 Celsius) the fenders become brittle enough to crack if impacted, so unless you never crash they will need periodic replacement. But they've proved to be an excellent solution for keeping the mud and slush off me through a Winter of riding!
REJUVENATING GRIPS WITH TRANSMISSION FLUID:
Rubber grips, like the ones on some tool handles as well as the ones on bikes, eventually become caked with grime and solvents do a pretty poor job of getting them clean. Instead of using harsh cleaners, use ATF +4 transmission fluid to clean and rejuvenate your rubber grippy parts. There may be other oily fluids that work, but I'm very partial to the pleasant red color and attractive scent of the ATF +4 formula so I recommend that.
Simply moisten a rag with the ATF and wipe down the rubber. Depending on the durometer of the rubber and the nature of the filth embedded therein, you may need to rub it a bit but vigorous scrubbing should not be required as the ATF lifts the contaminants from the rubber. Be sure to remove all the ATF when you're done, as it is slippery! Your rubber will be left looking and feeling like new.
Here are before-and-after pictures of the rubber handles on a pair of pliers that I cleaned to demonstrate:
Wednesday, March 21, 2018
Thursday, February 22, 2018
How To: Void the Warranty On Your Casio PX-5S
Updated on 2019-01-04, scroll down for update!
Here's a step-by-step guide to opening and cleaning the contacts on the PX-5S and similar Casio keyboards.
At the end of the guide is a series of pictures showing how I installed LEDS in the keyboard, and also a potential fix for the infamous Bb-key velocity problem.
Before you start: A bed makes a good surface for disassembly, but I found it easier to disassemble my keyboard right on the Z-stand. This allows access to all sides of the keyboard (including, importantly, the bottom) without having to roll it over.
IMPORTANT: Remember that these are small screws and they all thread into plastic! Be sure to set the screws when installing, and use little torque! It's better to have to re-snug them later than to strip the threads by installing them too tightly.
Here's a short video on how to set threads: https://www.youtube.com/watch?v=X1QjwVYbrDs
One more thing to note: All the screws are the same except the three internal keybed screws (distinctive because of their head shape) and the screws securing the access panels on the bottom (distinctive because they're smaller than the rest of the screws).
Tools you'll need:
#2 Phillips screwdriver (magnetic-tipped is best)
#1 Phillips screwdriver
Small pick for releasing the ribbon connector
Electronics-safe cleaner
Small applicator (I used cotton swabs but it's easy to leave strands of cotton so be aware of that)
Follow these steps:
Addressing the Bb Velocity Issue:
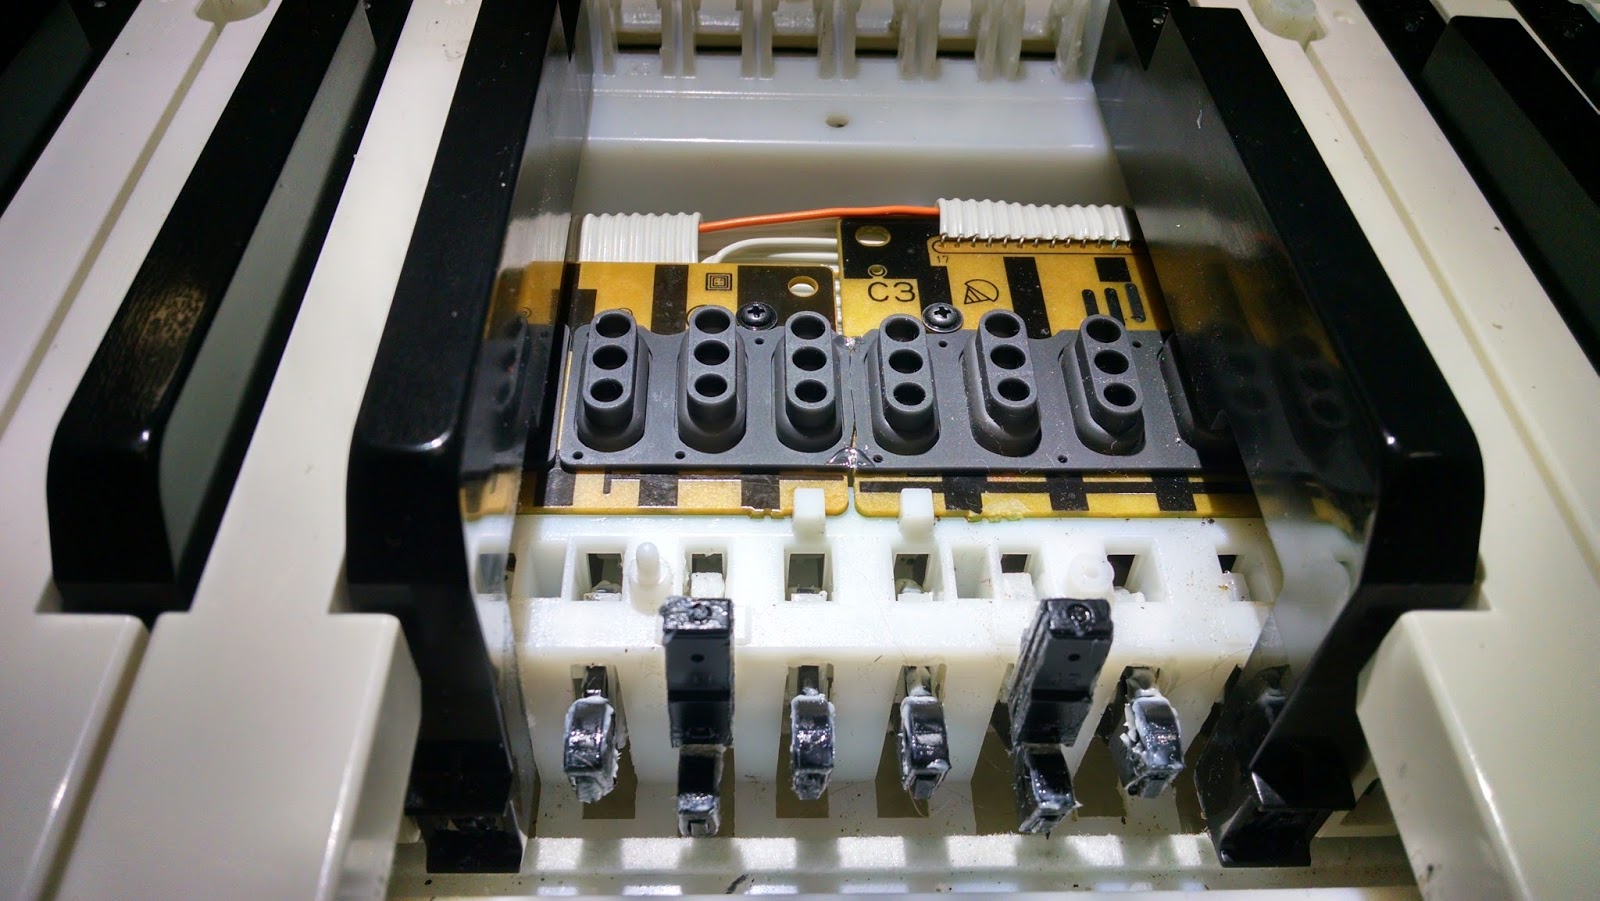
If you're here, you're probably already familiar with this issue so I won't go into detail describing it. Cleaning the contacts works well, but the problem will undoubtedly pop up again and most of us don't have the time to pull the board apart every few months to re-clean them.
I have a theory that the reason the issue affects this particular key (although it can pop up with adjacent keys also) is that the rubber dome strip doesn't fit flat to the PCB at this point. The rubber dome strip bridges a gap in the PCBs, and the spacing isn't quite perfect so the strip has a slight "wave" to it. This allows moisture to get underneath and contaminate the contact points.
My potential solution was to cut the rubber dome strip, and remove a little bit of material from one of the cut faces to allow the strip to rest flat. However, it should be noted that this will allow the cut ends to "flop" due to the spacing of the mounting dowels on the rubber strip. To secure the cut ends, I used a drop of hot glue on the front and back.
Make sure the hot glue goes around the top of the rubber, and underneath the bottom of the PCBs to form a sort of "I" shape. This will harden into a sort of clip to hold the rubber to the PCBs. This technique is necessary because hot glue won't adhere to the rubber.
Time will tell if this solves the moisture issue.
Update 2019-01-04:
The Bb issue is back! This time I am of the opinion that it's not condensation collecting as I suspected before, but that the factory-applied grease may be breaking down and the oily residue making it's way underneath the silicone dome strip via capillary action.
I replaced my chopped dome strip with a new one, and this time, to eliminate the "wave" in the strip, I decided to move the outer PCB a little bit to the left to widen the gap between it and the center PCB, thus taking up the slack in the dome strip and forcing it to lie flat.
First I disassembled the PX5S and removed all the keys over the left-side outer PCB. Then I removed the seven screws which secured the outer PCB.
The outer PCB is aligned in position by a small tab on the plastic chassis, which nests into a notch on the PCB to register it. In order to shift the PCB outward, I cut this tab off with nail clippers and smoothed the remains by shaving it with an X-Acto knife.
Here is the tab before I cut it off.
When I lifted the PCB off of the plastic chassis, I noticed an oily trail that had collected underneath the PCB. I suspect that this is a separation from the factory grease that was used to lube the key pivot points.
Just for fun, I installed a cotton ball in the space between the PCB and the plastic chassis, underneath the gap. The theory is that any further seepage will be collected by the cotton rather than allowed to creep up over the PCB and under the dome strip. Whether or not this will have any effect remains to be seen.
In order to shift the outer PCB to the desired location, I had to remove a bit of material from the inside of the screw holes.
Here you can see the original location of the registration tab that I cut off to shift the PCB. (Outlined in blue.)
With the PCB shifted over, the dome strip can now lie flat with minimal ripple. Hopefully this will prevent the oily residue from contaminating the contacts.
Here's a step-by-step guide to opening and cleaning the contacts on the PX-5S and similar Casio keyboards.
At the end of the guide is a series of pictures showing how I installed LEDS in the keyboard, and also a potential fix for the infamous Bb-key velocity problem.
Before you start: A bed makes a good surface for disassembly, but I found it easier to disassemble my keyboard right on the Z-stand. This allows access to all sides of the keyboard (including, importantly, the bottom) without having to roll it over.
IMPORTANT: Remember that these are small screws and they all thread into plastic! Be sure to set the screws when installing, and use little torque! It's better to have to re-snug them later than to strip the threads by installing them too tightly.
Here's a short video on how to set threads: https://www.youtube.com/watch?v=X1QjwVYbrDs
One more thing to note: All the screws are the same except the three internal keybed screws (distinctive because of their head shape) and the screws securing the access panels on the bottom (distinctive because they're smaller than the rest of the screws).
Tools you'll need:
#2 Phillips screwdriver (magnetic-tipped is best)
#1 Phillips screwdriver
Small pick for releasing the ribbon connector
Electronics-safe cleaner
Small applicator (I used cotton swabs but it's easy to leave strands of cotton so be aware of that)
Follow these steps:
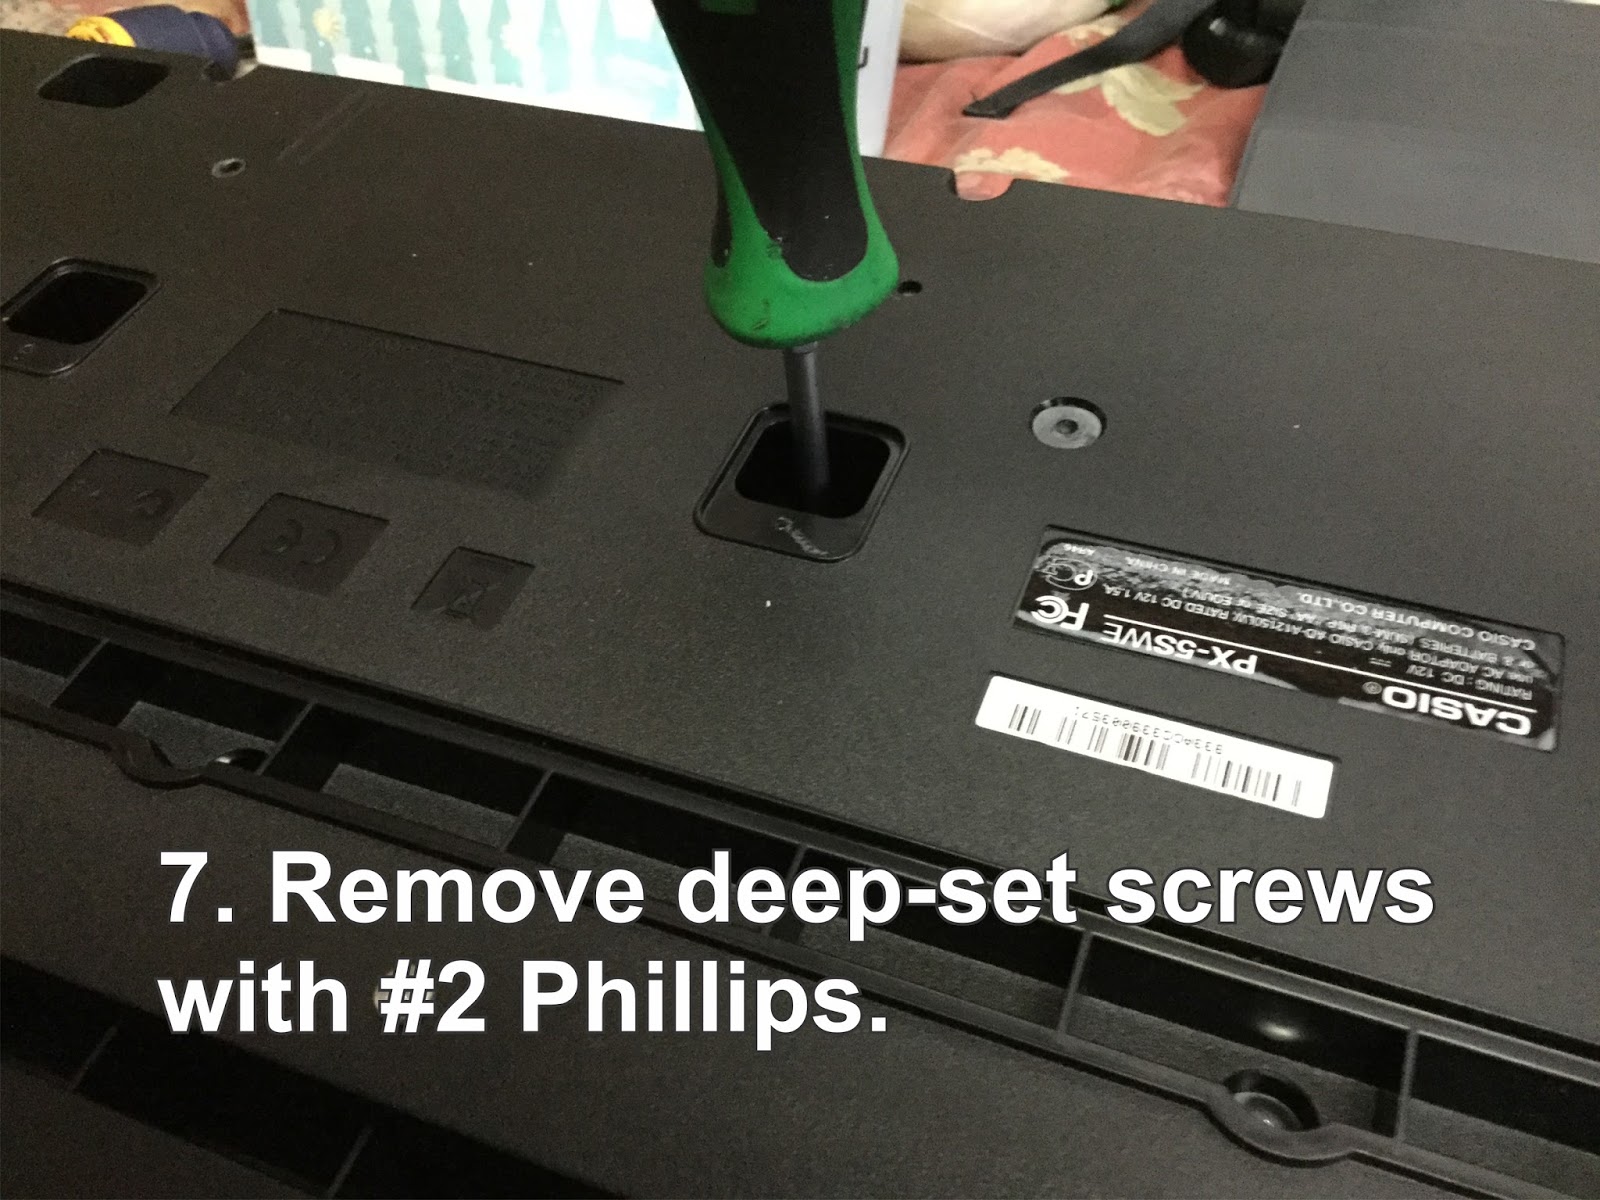
NOTE FOR STEPS 5-7: I usually start by removing the #1 Phillips screws and the access panels, then removing all the #2 Phillips screws. Again, I recommend doing this whole operation with the keyboard upright on it's stand if possible. If you perform Step 7 with the keyboard inverted as shown, you will need a magnetic-tipped screwdriver in order to extract the screws.
Addressing the Bb Velocity Issue:
If you're here, you're probably already familiar with this issue so I won't go into detail describing it. Cleaning the contacts works well, but the problem will undoubtedly pop up again and most of us don't have the time to pull the board apart every few months to re-clean them.
I have a theory that the reason the issue affects this particular key (although it can pop up with adjacent keys also) is that the rubber dome strip doesn't fit flat to the PCB at this point. The rubber dome strip bridges a gap in the PCBs, and the spacing isn't quite perfect so the strip has a slight "wave" to it. This allows moisture to get underneath and contaminate the contact points.
My potential solution was to cut the rubber dome strip, and remove a little bit of material from one of the cut faces to allow the strip to rest flat. However, it should be noted that this will allow the cut ends to "flop" due to the spacing of the mounting dowels on the rubber strip. To secure the cut ends, I used a drop of hot glue on the front and back.
Make sure the hot glue goes around the top of the rubber, and underneath the bottom of the PCBs to form a sort of "I" shape. This will harden into a sort of clip to hold the rubber to the PCBs. This technique is necessary because hot glue won't adhere to the rubber.
Time will tell if this solves the moisture issue.
Update 2019-01-04:
The Bb issue is back! This time I am of the opinion that it's not condensation collecting as I suspected before, but that the factory-applied grease may be breaking down and the oily residue making it's way underneath the silicone dome strip via capillary action.
I replaced my chopped dome strip with a new one, and this time, to eliminate the "wave" in the strip, I decided to move the outer PCB a little bit to the left to widen the gap between it and the center PCB, thus taking up the slack in the dome strip and forcing it to lie flat.
First I disassembled the PX5S and removed all the keys over the left-side outer PCB. Then I removed the seven screws which secured the outer PCB.
The outer PCB is aligned in position by a small tab on the plastic chassis, which nests into a notch on the PCB to register it. In order to shift the PCB outward, I cut this tab off with nail clippers and smoothed the remains by shaving it with an X-Acto knife.
Here is the tab before I cut it off.
When I lifted the PCB off of the plastic chassis, I noticed an oily trail that had collected underneath the PCB. I suspect that this is a separation from the factory grease that was used to lube the key pivot points.
Just for fun, I installed a cotton ball in the space between the PCB and the plastic chassis, underneath the gap. The theory is that any further seepage will be collected by the cotton rather than allowed to creep up over the PCB and under the dome strip. Whether or not this will have any effect remains to be seen.
In order to shift the outer PCB to the desired location, I had to remove a bit of material from the inside of the screw holes.
With the PCB shifted over, the dome strip can now lie flat with minimal ripple. Hopefully this will prevent the oily residue from contaminating the contacts.
Subscribe to:
Posts (Atom)